Draw Bonds
Summary
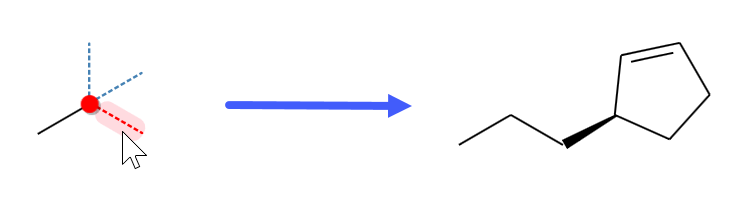
This topic demonstrates how to draw structures using the bond proposal tool, and how to change the type of a bond (single, double, etc.).
Step by Step
Extending bonds
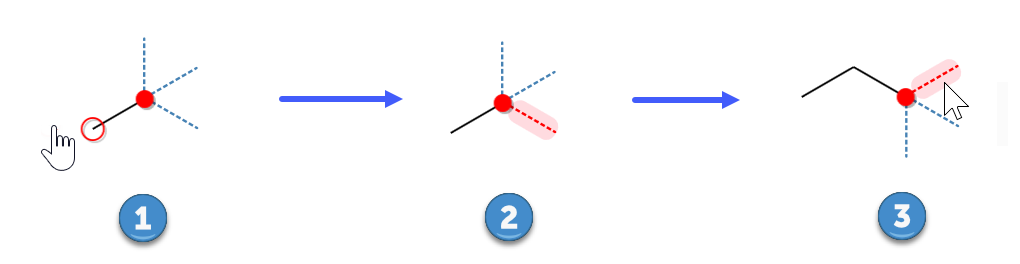
Click anywhere inside the empty drawing area to add a first bond. You will notice some dotted lines displayed at the bond end; these are so-called bond proposal lines, which help you to connect the next bond at a 'clean' angle (1). Moving the mouse over one of these lines highlights it (2), and a subsequent mouse click appends a new bond in the indicated direction, while creating another set of bond proposal lines at is end (3). If you prefer another bond position than the proposed one, you can always drag the bond end atom to the desired location after addition.
Continuing above process allows the rapid creation of structure skeletons by a series of mouse clicks. - It is of course also possible to attach bonds within existing structures: Just click the atom you would like to start a new bond from, to reveal its bond proposal lines.
Adding templates
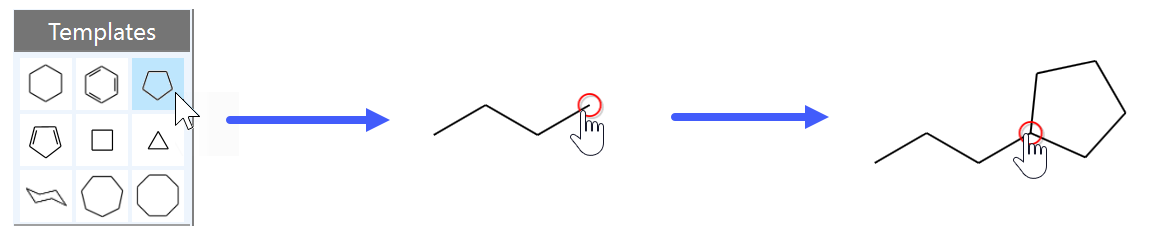
Also basic drawing templates can be utilized for abbreviating the drawing process. Select one of the template buttons in the side toolbar, then either click inside an empty space in the drawing area to add the template as a separate structure, or onto an existing atom to attach the selected template at a fitting angle:
Changing bond types
Now lets assign bond types: Move the mouse over the center of the desired bond until the blue bond selection rectangle appears (1), then right-click it to display the bond context menu (2), which allows the assignment of the desired bond type, or to remove the bond altogether. The example below shows the result of assigning an "Up" bond type to a first bond, then subsequently right-clicking a ring bond and assigning a double bond to it (3).
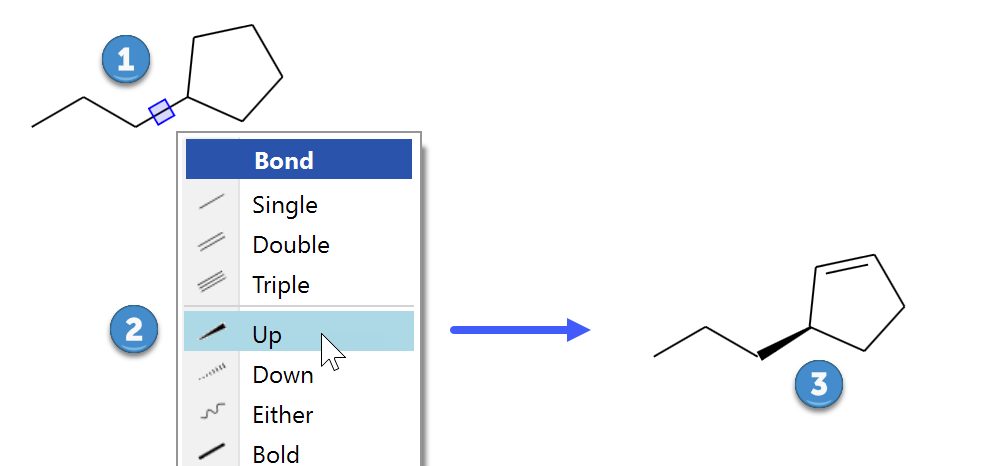
In case of the directed bond types Up/Down, re-assigning its bond type reverses the direction of the bond.